
Dorothy Russell
Textile Artist
Tutorial No 5. How to make and bury a knot at the end of the thread
This tutorial follows on from the Tutorial 2 which explains how to make and bury a knot at the beginning of a line of stitching when hand quilting.
It describes how to finish the thread with a knot which is also buried in the layers of the quilt and therefore not visible on either side of the work.

When you come to the end, either of the thread or of a section of quilting you need to finish off with a knot small and tidy enough to bury.

Keeping the needle in your working hand, take hold of the thread a little above the point where it comes out of the fabric just before you make the final stitch.

Keep hold of the thread while you slip the needle behind it…

…bringing it through the loop formed by the thread.

Pull it through the loop…

…until…

…the loop is…

…getting smaller…

…and forming a knot.

Take hold of the small loop of the knot between your index finger and thumb.

Keep pulling the thread gently with your working hand …

…until it is close to the fabric…

…and very small. Make sure the knot remains near the fabric by holding it between your finger and thumb and gently pulling the thread until it is a formed knot. NB The photo does not show it held between the finger and thumb so you can see the knot which is formed.

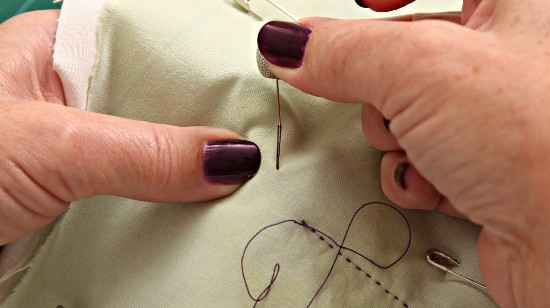
Put the needle into the top fabric and through to the wadding to form the final stitch….

…but not through to the back of the work.

Bring the needle out of the top fabric away from the quilting stitches you have just made.

Pull the thread through..

…until the knot is resting on the fabric.

Give a gentle tug on the thread to pop the knot through the top layer and into the wadding.

Snip off the thread close to the fabric.

The row of stitches is finished…

…without a sign of the securing knot on either side of your quilt.
Dorothy
Did that help?… email and tell me.