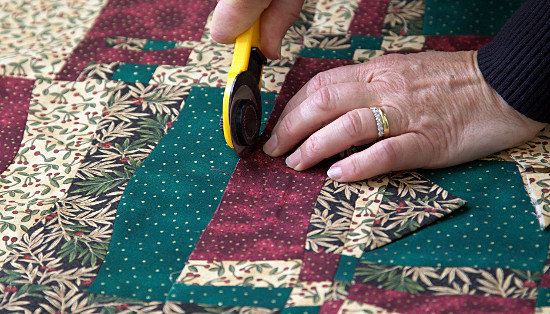
Yesterday I taught Free-cut Curves to a slightly disorientated group – they thought I had thrown away the rule book. I’m usually very fussy about safety and the correct use of rotary cutters. I’m prone to hissing ‘blade!’ at poor unsuspecting quilters who wave about or put down bare bladed cutters – with good reason, they are potentially very dangerous. However to do free-cut curves, you don’t use a ruler, just the cutter and mat. It tends to raise everyone’s caution levels but it gives some very interesting results.
I feel tempted to say ‘Don’t try this at home’ but I’ll resist and say try it by all means but be very careful – I think the best approach would be to remember when you were a child doing lino printing and you were told never to cut towards your fingers. The same approach applies to free-cut curves. Most adults are used to using sharp knives in the kitchen, so give it a go!
The curves can’t be too tight or they’d become very difficult to stitch together. You don’t actually need pins to line up the seams but I do still advise using a quarter inch foot when sewing them. You can’t get the same results from a conventional approach, so perhaps the group were right – we had thrown at least some of the rule book away.
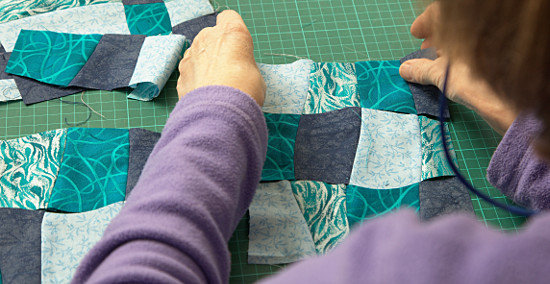
When I looked at everyone elses fabrics, I thought they were all much more interesting than the ones I had brought for demonstrating – how many times has that been heard at a workshop!
A few people brought work from earlier workshops or completed work from one of the courses.
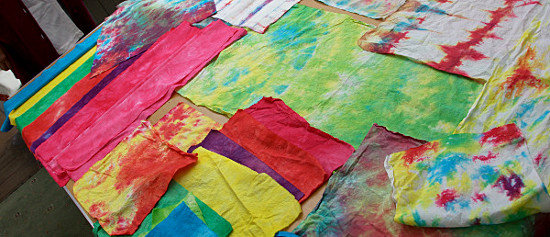
A week ago I taught ‘Fabric Dyeing’ which was agreed by everyone to be great fun, and some of the results very exciting – it probably helps that you have to wait at least three hours (I usually leave them overnight) before you can see the results of your experiments. It’s like Christmas Day for quilters, but instead of presents we open surprise packages of multicoloured fabrics and enjoy the patterns and colours which have formed. Margaret Harrison and Marion Gash brought their dyed pieces for us to see and they both had lovely fabrics which could be cut up and used or layered and quilted as wholecloth.
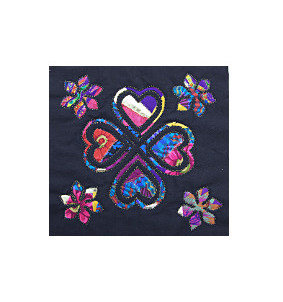
Previously, I had taught ‘Reverse Applique’ and Sue Turnbull brought the piece she had started at that workshop. Her arrangement is formal, but fun, and the jewel colours glow like the glass in a stained-glass window against the black of the top fabric. She has choices now about how to finish off her little quilt: she could have it framed as it is: do further quilting, perhaps on the black fabric: add decorative stitches and/or beading to the coloured sections or make lots more and join them together. (I can hear Sue’s response to the last suggestion as I write!)
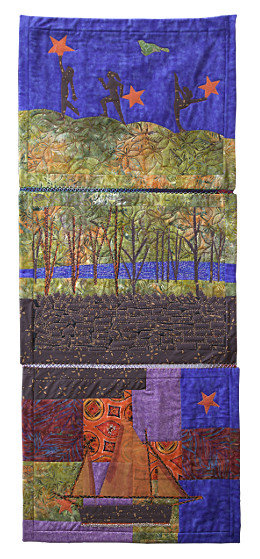
As part of her Intermediate Course, Ann Hill took Matisse’s cutouts as her starting point and allied his approach and colours to looking at women in sport – an allusion to last summer’s Opympic Games. The boat depicted in the lowest section is a Drascombe Lugger which once belonged to Ann and her husband. Ann’s husband is currently involved in a cycle ride from Land’s End to John O’Groats. (Good luck to him – I hope the weather’s kind.)
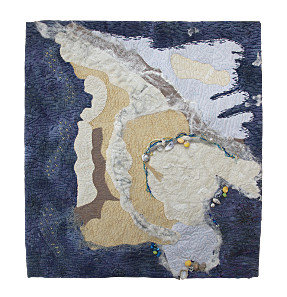
As part of the same project, Ann Davies, influenced by the work of a local artist, used a photograph she had taken of the foamy ripples of a wave on an Anglesey beach as the starting point from which she built this textile piece. She used a fascinating little hand drill to put the stitching holes in the shells and employed a lot of techniques, which were new to her, to very good effect.
Dorothy